Thursday, 14 March 2013

Negative effects of unlocked bootloader

Those who are expecting a little bit more from their HTC devices are familiar with HTC online tool to unlock the bootloader - htcdev.com. Once generated and flashed token via fastboot gives you possibility to change some of the partitions on HTC device. It sounds great, but there are some serious disadvantages of it. Some people may say this will result in limited warranty, which it is not true, and I explained that issue hereSo, what else to expect with unlocked bootloader?


First of all, not all the partitions will be unlocked. Forget about flashing hboot.img, rcdata.img or tp.img. Permission to fastboot flash will be denied. The only method to flash those images is to reboot device in RUU mode (fastboot oem rebootRUU) and flash originally signed firmware.zip (from OTA update) using fastboot flash zip firmware.zip command.

So what can be flashed in fastboot mode? Basically just 3 images - boot.img, recovery.img and system.img. Is it enough to flash custom ROM? Yes. With custom recovery you can flash zips or make nandroid backup. Is it enough to be happy? No. The problematic part is flashing boot.img in custom recovery. It's not possible on S-ON devices, unless your device is supported by 4EXT Recovery with SmartFlash feature. So the only method to have complete custom ROM working, is to flash ROM in recovery and then reboot the device, enter fastboot mode and flash boot.img using fastboot flash boot boot.img command.

The second problem of unlocked bootlader is even more serious, but so far it affects only 2 devices: HTC One X+ and HTC One. Those who used htcdev.com before probably noticed, that unlocking bootloader wipes user data, including content of virtual SD card (because virtual SD card = /data/media).

This is no surprise, because every user is warned about it and have a chance to step back. As long as all applications coming with stock ROM are stored on /system partition, there are no side effects. But for some very strange reason in HTC One X+ and HTC One, some of the stock applications like Flashlight, Calculator, Ringtone-trimmer, PDF Viewer, Teeter, Sound Recorder and more, are stored on /data partition instead. Result? After unlocking bootloader with official HTC tool you end up without having some of the basic HTC applications like Calculator or Flashlight, because /data partition (as mentioned above) has been wiped. System partition on HTC One is almost 2 GB big. Not enough to include few more .apk files?

What is more, missing stock applications on /data partition makes your device not capable to receive any OTA updates from HTC. Why? Because every OTA update checks MD5 checksum of every file that originally came with your device. So even if you didn't flash any custom ROM and your /system partition is unmodified, you won't be able to install OTA update.


This is an example of updater-script part from OTA:

assert(apply_patch_check("/data/preload/Calculator.apk","85aa7b00ec97ffe7179739c8815bf102c4f8666e","7055f0376e6b56be6414fdf8495b82db7fd38564")||apply_patch_check("/data/preload/Calculator.apk.uninstall","85aa7b00ec97ffe7179739c8815bf102c4f8666e","7055f0376e6b56be6414fdf8495b82db7fd38564"));

Once assert will fail, OTA update will cancel the installation process. I think every user should be warned, that unlocking bootloader results in no longer OTA updates support.

To summarize:
  1. Unlocked HTC devices via htcdev.com can't have boot.img flashed via custom recovery.
  2. Unlocked HTC One X+ and HTC One via htcdev.com will loose some basic HTC applications like Flashlight or Calculator.
  3. Unlocked HTC One X+ and HTC One via htcdev.com will loose possibility to receive OTA updates unless user will flash original RUU.exe, which are not officially available for customers.
Conclusion: Is it worth to buy HTC One? Yes! It is currently the best device on the market. If you are not planning to flash any custom ROM - don't unlock your bootloader. And if you want to flash custom ROM, it will probably contain missing applications anyway. This is far too great device and I believe HTCdev team will sort out above issues soon!

Got some questions or comments? Please feel free to leave them above! Also, if you like this article, please use media sharing buttons (Twitter, G+, Facebook) down this post!


Monday, 11 March 2013

Share localization files between Windows Phone and Windows 8

    As I wrote in my previous post I am getting back with a post on how to share the localization files between Windows Phone and Windows 8. This should be a simple task, but in the current version of the Windows Phone SDK and Windows 8 it cannot be easily done. The target is to have only one of the two projects (Windows Phone or Windows 8) that manages the localized (in this sample I am only taking in consideration localized strings but the concept can be easily extended) and use it in the other project. Also I wanted to use the Multilingual App Toolkit to easily manage the translations inside the project.
    First let's see what we have:
  • Windows Phone + Multilingual App Toolkit
    1. The main resource file is called AppResources.resx and is inside the Resources folder 
    2. The AppResources.resx automatically generates the AppResources class
    3. The files generated by the Multilingual App Toolkit for the Windows Phone project are also inside the "\Resources" folder and the name look like AppResources.[culture].xlf
    4. We have a class called LocalizedStrings.cs that helps us with the binding inside xaml files
  • Windows 8 + Multilingual App Toolkit
    •  The main resource file is called Resources.resw and it is inside the \strings\[Default language] folder
    • The Resources.resw doesn't have .cs class in code behind generated (it uses the ResourceLoader class to load the localized values). We can also have values with "." like MainButton.Text to directly use inside xaml with the x:Uid.
    • The files generated by the Multilingual App Toolkit for Windows 8 are inside the "\MultilingualResources" folder and the names are [AppName]_[culture].xlf
    So we cannot directly use the files from one project to another.  There are a lot of differences but the couples (AppResources.resx, Resources.resw) and all the (AppResources.[culture].xlf, [AppName]_[culture].xlf) have different names but share very similar structure (they share most of the structure). 

     My approach and idea is to automatically generate the set of localized files needed by one solution directly from the set of files of the other project at compilation time. As source I have chosen the Windows Phone resource files (the other way around is more difficult as we could have resources not supported by Windows Phone). In order to automatically generate the resource files I have created a console application that would be run as a Post-build event on the Windows Phone project and write the necessary files to the Windows 8 project. the Windows 8 project build will be set to depend on the Windows Phone project this way we will always have updated resources when we run it. The console application needs three parameters/inputs: the folder of the Windows Phone project (source), the folder of the Windows 8 project (destination), and the name of the Windows 8 project as we will need it when we generate the [AppName]_[culture].xlf files for the Windows 8 project. The console application also automatically generates the AppResources.cs class inside the Windows 8 projects which is a class similar to the one used by Windows Phone. The source code for the Console Application is also included in case you need to do some changes and also the full sample.
     So let's see what would be the steps you will have to make if you want to use the solution.
  1. Create a Windows Phone application (in the attached sample the project WindowsPhoneApp). Using the Tools menu enable the Multilingual App Toolkit and using right-click on the project name select "Add translation languages..." to support more languages (in the sample is italian)
  2. Create the Windows 8 projects (in the attached sample the project called WindowsStoreApp). Create the the folder structure \strings\en and add the file Resources.resw to it. Inside the Package.appxmanifest set the default language as en. Now use the Tools menu and enable the Multilingual App Toolkit on the Windows 8 project and add the same languages that you have added to the Windows Phone Project. 
    If later you want to add another language support remember to add it to both Windows 8 and Windows Phone projects.
    This is how our solution looks :
    two different projects each of one with its localization part. Now we will set that the Windows 8 project build depends on the Windows Phone project and set the post-build action of the Windows Phone project to be:

    $(SolutionDir)ConvertAppResources\$(OutDir)ConvertAppResources.exe "$(SolutionDir)WindowsPhoneApp" "$(SolutionDir)WindowsStoreApp" WindowsStoreApp

    where ConvertAppResources is the project that converts the resources. We pass 3 parameters to the console application:
    1. the folder of the Windows Phone application which is the source - "$(SolutionDir)WindowsPhoneApp"
    2. the folder of the Windows 8 app which is the destination - "$(SolutionDir)WindowsStoreApp"
    3. the name of the Windows 8 app- WindowsStoreApp
    In our case the console application will generate and overwrite Resources.resw, WindowsStoreApp_it.xlf and WindowsStoreApp_qps-ploc.xlf. It will also generate the file AppResources.cs in the Windows 8 application folder which you will have to include in the project after the first compilation of the Windows Phone application.
    To keep things even more similar to Windows Phone method I have added the class:

     using Localization;  
    namespace WindowsStoreApp
    {
    /// <summary>
    /// Provides access to string resources.
    /// </summary>
    public class LocalizedStrings
    {
    private static AppResources _localizedResources = new AppResources();
    public AppResources LocalizedResources { get { return _localizedResources; } }
    }

    }

    and inside App.xaml added the resource:

     <Application.Resources>  
    <ResourceDictionary>
    <local:LocalizedStrings x:Key="LocalizedStrings"/>
    <ResourceDictionary.MergedDictionaries>
    <!--
    Styles that define common aspects of the platform look and feel
    Required by Visual Studio project and item templates
    -->
    <ResourceDictionary Source="Common/StandardStyles.xaml"/>
    </ResourceDictionary.MergedDictionaries>
    </ResourceDictionary>
    </Application.Resources>

    This way you could easily bind in Windows Phone style and even reuse xaml and cs that you already have from your Windows Phone project:
    Xaml Binding
      <Button Content="{Binding Path=LocalizedResources.ButtonText, Source={StaticResource LocalizedStrings}}" HorizontalAlignment="Left" VerticalAlignment="Top" Margin="517,302,0,0" Height="100" Width="283" Click="Button_Click"/>  
    and/or code-behind:
     MessageDialog md = new MessageDialog(AppResources.ButtonMessage);  

    If you want to know more on how the conversion works look inside Program.cs. The steps I do is save the Resx to Resw and generate the class AppResources.cs. After that for every .xlf file in the Windows Phone Resources folder  I generate and write the corresponding Windows 8 .xlf file (there are some conversions involved). If you want you don't have to add the project ConvertAppResources to your solution but only add the output .exe file to one of the projects and be very careful when you write the post-build action command.

    Once everything is setup-ed you will only have to modify the Windows Phone resource strings and the Windows 8 ones will get updated. If you want to use specific Windows 8 resources you can add more resource files and use the ResourceLoader to load them - for example if you've added the file Errors.resw to the \strings\en folder of the Windows 8 project you will access it like this:

                    var resourceLoader = new ResourceLoader("Errors");
                    this.Scenario5TextBlock.Text = resourceLoader.GetString("InvalidOperation");


    Be careful:

    • before adding the post-build action verify that the localization of both Windows Phone and Windows 8 project work (independent from each other) 
    • if the post-build command is not right the Windows 8 application will not get the updated resources when you compile the windows phone project
    • the Window 8 project has to depend on the Windows Phone project this way you will be sure that Windows 8 gets the updated resources
    • modify ONLY the Windows Phone .resx and .xlf files

    Some limitations of the Multilingaul App Toolkit:

    • If you modify the Resx file and add a new resource you will have compile the project before you will see the new string in the .xlf files
    • If you are modifying the Resx file for a resource that you have already localized when you compile you will loose the localization and you will have to modify the .xlf files again.  


    Let me know if you have problems understanding or making it work (I don't think that I was really good at explaining the process but the hack works).


    SOURCE CODE

    NAMASTE

    HTC One X+ give-away winner is...


    I'm happy to announce, that the winner of HTC One X+ give-away contest is...


    The winner should send me a private message via Twitter within 7 days with his e-mail address. After 7 days of no contact from the winner, I'll randomly pick another winner.


    Congratulations Barry!


    This was the first, but not the last contest. Next time you'll probably have a chance to win brand new HTC flagship device - One. Good luck!

    PS. Since some users have issues with their tweeter accounts, next give-away will be based on different rules to encourage even more people!

    Thursday, 7 March 2013

    Easily localize your Windows Phone applications using the Multilingual App Toolkit

      Great news for Windows Phone developers. Today Microsoft released an updated version of its Multilingual App Toolkit for Visual Studio 2012 that supports also Windows Phone projects (the previous version only supported Windows Store projects). You can download the Visual Studio Extension from HERE. The extension itself is multilingual:
       So why is this extension so great in my opinion? As you probably know Windows Phone projects in Visual Studio already support multilingual localization for the applications based on .resw files. The Multilingual App Toolkit adds support for localization industry-standard XLIFF file format and also connects with the Microsoft Translator for quick translation suggestions.
      Lets have a quick looks on how it works. After you have installed the extension you will find a new menu entry inside the Visual Studio 2012 Tools menu with which you can enable or disable the Multilingual App Toolkit for your Windows Phone project.

     Once you have enabled the Multilingual App Toolkit Visual Studio added the XLIFF support and also generates the AppResources.qps-ploc.xlf which is the pseudo-language engine that helps identify translation issues during development. 
       From this moment you will USE ONLY the AppResources.resx file to add new resource strings and the extension (at compilation) will add the missing strings to the corresponding .xlf file. 
        To add new languages to your application you will only have to select the desired language as supported in the project Properties inside the Application section. Once a language is selected the extension automatically generates the corresponding Xlf file.

        You can then double click on the xlf file and Visual Studio will open the Multilingual Editor that enablesyou to edit the translation. If you add new strings to your AppResources.resx file remember to compile the project before opening the .xlf file or you will not see the newly added strings.

      Now with these 3-4 easy simple steps we have localized our application. You can use the the Microsoft Translator in order to have some suggestions but you should always double-check the translation in order to avoid strange translations and situations ("My Application" in italian is translated as "La mia domanda" which actually means My question).


      If you are building a test application remember to add the binding to the resource strings inside your .xaml and .cs files ({Binding Path=LocalizedResources.ApplicationTitle, Source={StaticResource LocalizedStrings}}" Style="{StaticResource PhoneTextNormalStyle} for Xaml or AppResources.value for .cs  )
     Some words about the AppResources.qps-ploc.xlf pseudo language file. Pseudo Language is an artificial modification of the software product intended to simulate real language localization. The pseudo language can be used to detect potential localizability issues or bugs early in the project cycle, before the actual localization starts. For more details about localizability testing with Pseudo Language see Localizability Testing. Inside Visual Studio if you right click on the Pseudo Language file you can select the Generate pseudo translations. 

    In order to test it you will have to set the qps-ploc culture for the Application UI. Just add these 3 lines to your Application constructor (but remember to take them out when you don't need them anymore):

      public App()  
    {
    var ci = new System.Globalization.CultureInfo("qps-ploc");
    Thread.CurrentThread.CurrentCulture = ci;
    Thread.CurrentThread.CurrentUICulture = ci;


     More details on how to use the Multilingual App Toolkit can be found HERE.

     It is really great that Microsoft is migrating the localization of the apps to an open standard. I will get back to this subject with a post on how to share the same xlf files between windows phone and windows 8 projects)

    NAMASTE

    Saturday, 2 March 2013

    Unlocking bootloader or flashing custom ROM doesn't void your warranty!

    Since HTC started htcdev.com with the possibility to unlock bootloader on HTC devices, I noticed that false information and beliefs are spreading around the world and more and more people think (and tell!) other users, that their warranty will be voided after unlocking particular device. This is not true!

    In the past I wrote a short article on xda-developers about warranties and why, against common believes, flashing custom ROMs does not void your warranty. You can find this thread here.

    Here's some information worth pointing out:
    1. Warranty is a contract. In every country there are laws and regulations about warranties, however these vary from place to place and may be slightly different in your country, keep that in mind.
    2. If it's a contract, then both sides have some obligations and rights. Both - rights and obligations - needs to be written in the warranty, otherwise they doesn't exist. Warranty statements must be consistent with generally applicable law.
    3. As a contract, warranty can be created as the parties want, as long as it's consistent with generally applicable law.
    4. To know exactly what's written in your warranty don't try to Google it - take it out of the box and READ IT. Don't trust what others say - their warranty might be different to your own.
    Now, the question is - why unlocking the bootloader doesn't void the warranty? The answer is very simple. Because HTC's warranty contract doesn't state it. The only information about warranty on htcdev.com you can find is this:


    So, once again:

    "It is our responsibility to caution you that not all claims resulting or caused by or from the unlocking of the bootloader may be covered under warranty."

    Is there any information, that unlocking bootloader voids warranty? Nope. So basically, what does it mean? Only this - if you brick your device as a result of e.g. flashing custom ROM (unlocked bootloader allows you doing that), you may have no warranty claim for that particular incident.

    Two more important things to conclude:
    1. If "not all claims may be covered under warranty", then (logic conversion) some claims may still be covered under warranty.
    2. Even if you can't claim something under warranty because it was caused by or from the unlocking of the bootloader, that doesn't mean you have lost your warranty. You still have your warranty and you still can claim under warranty, but this warranty won't cover those particular claims caused by or from the unlocking of the bootloader.
    So basically, HTC warns you, that some of the actions you might take after unlocking the bootloader may lead to a situation, when particular issue can't be covered under warranty.

    Also, this information on htcdev.com doesn't expand or restrict your warranty terms. It doesn't change it at all. If warranty is given in the paper form, then as a contract the only way to change it, is a paper form too (if not stated otherwise in the warranty itself). HTC just kindly reminds you some sort of information you can conclude from the warranty itself.

    Once again, if you are interested why flashing custom ROMs doesn't void warranty as well, please read this thread.

    PS. I'm also wondering why Samsung users are so crazy about so called flash counter and "Triangle Away" application. They don't need it to have a valid warranty, even with a yellow triangle.


    Disclaimer:

    This text is just for education purpose. It's not a law itself so you can't base your claims versus a company on this. I may be wrong in many parts - feel free to write a comment under this post and I will make any necessary corrections. I don't know the laws in every country so there may be some slight differences.


    Have any questions or comments? Feel free to share! Also, if you like this article, please use media sharing buttons (Twitter, G+, Facebook) below this post!

    Using dojo.query with IDs containing colon symbol

    While working on my XSnippet to move between pages in a pager control using arrow keys I required to get elements based on pager ID. So I went with dojo.query. But selectors in dojo.query cannot contain characters like colon which XPage extensively uses for generating IDs.

    So the code dojo.query("view:_id1:viewPanel1:pager1") will not work. To make it work you need to escape the : with \: or even better with \3A, for backward compatibility with IE.

    I wrote a simple helper function escape colon characters from ID.

    Thursday, 28 February 2013

    [Give Away] HTC One X+

    Here is something awesome for Android Revolution HD users. I will give away one, brand new HTC One X+ (GSM only) in color of your choice - black or white, to one winner of this little competition. There is no country limit - it's a worldwide party!

    The competition starts at 12:00 PM (GMT + 1) on Monday 4th, March 2013 and will continue until 12:00 PM (GMT + 1) on Sunday 10th, March 2013. Winner will be announced on Monday 11th, March 2013.

    What you need to do:

    1) "Like" HTC (facebook.com/htc) and Android Revolution HD (facebook.com/AndroidRevolutionHD) on Facebook

    2) "Follow" HTC (@HTC) and Android Revolution HD (@mike1986_) on Twitter

    3) Tweet about this contest with link to this page using hash-tag "androidrevolutionhd" (#androidrevolutionhd)
    Example tweet: Win HTC One X+ at http://android-revolution-hd.blogspot.com/2013/02/give-away-htc-one-x.html #androidrevolutionhd

    Note: If you already meet the requirements from points 1 and 2, now all you need to do is tweet! No need to re-follow or re-like accounts mentioned above. Re-tweets doesn't count. This must be your own tweet. Remember to include link to this contest and hash-tag #androidrevolutionhd.

    How will I select the winner? I will randomly choose one person from the list of my Twitter followers who tweeted about this give away using #androidrevolutionhd hash-tag. Is that all? Yes! Easy as that! Just 2 clicks and 1 tweet to win amazing, high-end HTC One X+ - Engadget's Smartphone of the Year! 

    Good luck!


    Want to learn more about HTC One X+?
    Visit this site - HTC One X+ overview

    Wednesday, 20 February 2013

    The only One

    Some high quality pictures of new HTC flagship device - the One.

    Many people already asked me about the colors of HTC One and which one is better. I was holding both versions side to side and in reality silver one looks better in my opinion. On the pictures, the black one looks very good too, but when holding a silver HTC One you can see how the aluminium zero-gaps body is shining and it looks really gorgeous. Black version doesn't reflect light that much but some potential scratches might be less visible there, which is an advantage. So, which color will you pick? :)


    How to build a multi-touch control for Windows Phone

         What I intend for multi-touch? Windows Phone is already a multi-touch device but for some reason (I guess it is legacy of Silverlight) the standard Xaml controls don’t have a real multi-touch behavior. Real multi-touch means that I should be able to interact with two different objects at the same time with multiple fingers. What happens now for the XAML standard controls is that once a control start receiving touch events (ManipulationStarted, ManipulationEnded, ManipulationDelta) all the other controls will not receive touch events. The easiest test to do is add a standard button on the page, put one finger on the screen outside the button and try to press the button with another finger. You will see that the button does not respond to your commands. For Xaml applications this might not be a problem, but for games it becomes one. Xaml (I mean Xaml+C# or XAML+VB.NET) is fast to develop easy games.

    The solution would be to build your own control and use Touch.FrameReported to “drive” it. In this sample I will build a multi-touch button. I will call it ButtonEx (some of you remember OpenNETCF J?) and I will just add three events to it: TouchDown, TouchUpInside, TouchUpOutSide (iOs MonoTouch event names). With this three events I should have better control (Click in reality is a TouchUpInside event) .
    So I've created a new Windows Phone Class Library called ControlsEx and I added the control ButtonEx derived from ContentControl. I copied the standard style of the Button control (you can easily generate it from a standard button using Blend and Edit Copy command on the Button Template). I've then added the style to the /Themes/generic.xaml file inside our project.  When I create the control I will subscribe Loaded and Unloaded events as I want to start receiving Touch events when the control loads and unsubscribe the Touch events when the control gets unloaded.

      public ButtonEx()  
    {
    DefaultStyleKey = typeof(ButtonEx);
    this.Loaded += ButtonEx_Loaded;
    this.Unloaded += ButtonEx_Unloaded;
    IsEnabledChanged += ButtonEx_IsEnabledChanged;
    IsPressed = false;
    }
    void ButtonEx_Loaded(object sender, RoutedEventArgs e)
    {
    Touch.FrameReported += Touch_FrameReported;
    }
    void ButtonEx_Unloaded(object sender, RoutedEventArgs e)
    {
    Touch.FrameReported -= Touch_FrameReported;
    }

         Now everything we need “happens” inside the Touch_FrameReported  method. For my button I am interested to trace only one finger(using its id) from TouchAction.Down until TouchAction.Up. Once the first finger is down on the surface of my control I memorize the id and track it’s actions till it leaves the screen. Depending of the control that you are building you might have to take in consideration multiple fingers. One thing that is pretty important when starting to track a finger is to see if your control is in front or not (imagine an MessageBox over your controls and when you press the Ok button you will also press the button which is in the back). To resolve this issue I’ve used TouchDevice.DirectlyOver property of the TouchPoint and the VisualTreeHelper to see if the UIElement returned by DirectlyOver is a member of my control or not.
      bool IsControlChild(DependencyObject element)  
    {
    DependencyObject parent = element;
    while ((parent != this) && (parent != null))
    parent=VisualTreeHelper.GetParent(parent);
    if (parent == this)
    return true;
    else
    return false;
    }
    Here is the method Touch_FrameReported method:

     void Touch_FrameReported(object sender, TouchFrameEventArgs e)  
    {
    if (Visibility == Visibility.Collapsed)
    return;
    TouchPointCollection pointCollection = e.GetTouchPoints(this);
    for (int i = 0; i < pointCollection.Count; i++)
    {
    if (idPointer == -1)
    {
    if (IsEnabled&&(Visibility==Visibility.Visible) && (pointCollection[i].Action == TouchAction.Down) && IsControlChild(pointCollection[i].TouchDevice.DirectlyOver))
    {
    //start tracing this finger
    idPointer = pointCollection[i].TouchDevice.Id;
    IsPressed = true;
    VisualStateManager.GoToState(this,"Pressed", true);
    if (TouchDown != null)
    TouchDown(this, pointCollection[i].Position);
    }
    }
    else if ((pointCollection[i].TouchDevice.Id == idPointer) && (pointCollection[i].Action == TouchAction.Up))
    {
    idPointer =-1;
    IsPressed = false;
    UpdateIsEnabledVisualState();
    if ((pointCollection[i].Position.X > 0 && pointCollection[i].Position.X < ActualWidth) && (pointCollection[i].Position.Y > 0 && pointCollection[i].Position.Y < ActualHeight))
    {
    if (TouchUpInside != null)
    TouchUpInside(this, pointCollection[i].Position);
    }
    else
    {
    if (TouchUpOutside != null)
    TouchUpOutside(this, pointCollection[i].Position);
    }
    }
    }
    }
        For the button control we don’t have to trace the movements of the finger until Up action but we might need to if we are writing a Slider control for example. The sample application that you will find in the source code uses 2 ButtonEx controls and a standard Button control. The ButtonEx should always respond to your commands (fingers).

        I’ve also used this approach to develop an multi-touch XAML game for flying an Bluetooth BeeWi helicopter. I will also have a session on the 27th February at Community Days here in Italy where I will present a session on developing a game for Windows Phone and I will use this game as a starting point. This application has multi-touch buttons, slider and joystick control.

    Also have to thank the TTT (Train The Trainer) program which awarded me a beautiful Sphero for my multi-touch controls.

    As always don’t hesitate to contact me if you have further questions.
    NAMASTE

    Wednesday, 13 February 2013

    Android Revolution HD on HTC London Event


    On Tuesday, February 19th, 2013 in London there is something big going to happen. We've all heard some rumors and seen leaked pictures, but there is nothing officially confirmed just yet. Our biggest expectation is to see new high-end HTC device called HTC One (HTC M7) running new user interface - HTC Sense 5.0. Maybe there is something more...

    Why am I writing all this? Because I will be there, relating on live this great event. From Feb. 18th I'll be in London with HTC, counting down the last minutes to the show beginning. Follow me on Twitter (@mike1986_), watch my Facebook site (http://www.facebook.com/AndroidRevolutionHD) and check out this blog regularly for hot & fresh news, photos and details about upcoming HTC top products!

    You can see my photos from that great journey here - http://android-revolution-hd.blogspot.com/p/trip-to-london-for-htc-event-2013.html


    Writing to log.nsf via Formula, LotusScript or Java

    While debugging @Formula code I was using a lot of @StatusBar command to output values in status bar to debug. But the status bar in Lotus Notes shows only around 20-30 last entries. I was looking for a way to write that information to my local log.nsf where I could see the entire trace and analyse it. That's when I ran into this post on Notes/Domino 8.5 forum. It says that by adding LogStatusBar=1 to your notes.ini all the messages that get printed to status bar will be written to log.nsf. And problem solved!

    As this method writes every message printed in status bar to log, it works for any language running on client.

    Tuesday, 5 February 2013

    Update the HTC Mazaa to Windows Phone 7.8

     HTC Mazaa was the first ever Windows Phone to run the 7.5 build of the OS. It is a really great development device (as performance it is somewhere between the gen 1 devices and the gen 2 devices) but unfortunately it haven't received any updates since the RTM release build 7.10.7720.68. If you still have RTM build on it you will probably see that you are not even able to access the Store anymore. The bad news is that it will not receive any automatic updates but if you want you can still manually update it to the Windows Phone 7.8 version on it.
       To manually update the device you will need :
    1. Zune 4.8 final (build 4.8.2345.0)
    2. Download the WP7_update_tool.rar and install the UpdateWP package for your platform (x86 or x64). This is version 4.8.2134.0. You can download the Update tool from this post
       What you will need to do is simulate the steps that Zune does when it updates your phone. At each step there are a number of cab that you can send to the phone at the same time. BACKUP YOUR PHONE before updating. This tutorial starts the update from the version 7.10.7720.68 up to 7.10.8858.136. If you have a heigher version than 7.10.7720.68 just start from the step of the version you have. We assume that your Mazaa has the following language packs installed (if you have less just remove the corresponding cabs from each step):
    • German (0407)
    • English - United States (0409)
    • French (040C)
    • Italian (0410)
    • English - United Kingdom (0809)
    • Spanish (0C0A)
       At each step just run:
     updatewp /iu [concatenate cab's from step here with space between]

    Here are the cabs for each step:

    1) 7.10.7720.68-7.10.7740.16

    2) 7.10.7740.16-7.10.8107.79


    3) 7.10.8107.79-7.10.8112.7

    4) 7.10.8112.7-7.10.8773.98


    5) 7.10.8773.98-7.10.8779.8 

    6) 7.10.8779.8-7.10.8783.12

    7) 7.10.8783.12-7.10.8858.136

    If you have problems updating please let me know.

    BTW I am not responsible if you BRICK your phone :) . Here is mine updated:


    NAMASTE

    Monday, 4 February 2013

    How to use Team Foundation Service with MonoDevelop

      As you probably know Team Foundation Service team announced a few days ago full support for Git protocol. This was AWESOME news for our small company that needed a FREE source control solution for our MonoTouch and Mono for Android projects. We were already using visualstudio.com for our Windows Phone and Windows 8 projects and previously to Git support in TFS we had an in-house svn server but I was not really happy with it. The thing it took me most was to understand what is the Git endpoint address than everything is standard.
      Here is a quick guide on how to create and then use a TFS Git repository with MonoDevelop:
    1. First you need to create a new Team Project with Git support 
         
         Once the project is created press the "Navigate to projec"t button. 

    2. Go to Code explorer and you will be able to see the the Git endpoint address. It might not show the git endpoint the first time but if you navigate away and try again you will see it.


    3. Use the Git endpoint address to register a new Repository in MonoDevelop


    4. Then just publish your solution using the registered repository. You can see all your files in Code Explorer and also all the commits:


    Tip: If you want to use a more simple user name than you full live id you can enable your Alternate Credentials on the User Profile page 


    The same Git endpoint can be also used to "Connect to a repository" in Xcode for your Obejctive C projects.

    Thank you TFS TEAM for this great feature.


    NAMASTE

    Friday, 1 February 2013

    Functions and properties of the XSP object

    Stephan Wissel has blogged about some useful functions of XSP obeject. But the list is not complete. So I decided to put the XSP object through my helper JavaScript function listPropsAndFunctions. Below is the list of whatever I could find. I would be updating this list with explanation of whatever properties and functions I am able to find from time to time.

    _allowDirtySubmit

    _dirty

    _dirtyFormId

    _eventNameHtmlToWidget

    _listeningForDojo

    _listeningForDojoOnload

    _onLoadListeners

    _submitValue

    _submitValueSet

    Continue reading »

    Wednesday, 30 January 2013

    BlackBerry comes out swinging with Z10 and Q10 smartphones


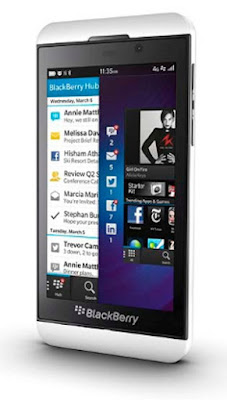
    The new BlackBerry Z10 and BlackBerry Q10 smartphones were officially announced today as the company's first smartphones powered by QNX technology, which has also been used in the BlackBerry PlayBook tablet, as well as in the auto and health care industry.

    The BlackBerry Z10 is the touchscreen device with a textured surface, a slight curve on the back and a 4.2-inch display. It also has a 1.5 gigahertz dual-core processor, 2 gigabytes of RAM and 16 GB of internal storage, with an expandable memory slot and micro HDMI out port. Near Field Communication, or NFC, is included to support the emerging mobile payments technology.

    The BlackBerry Q10 comes with a physical QWERTY, Bold-style keyboard that has been so popular with BlackBerry fans over the years. It has the same specifications as the Z10, along with a glass-weave cover that is pitched as being stronger than plastic.

    Both devices will come in white and black and have a removable battery.

    BlackBerry fans will find many new features, such as the BlackBerry Hub and BlackBerry Balance. The latter allows users to balance their work and personal information.

    There are 70,000 applications available, including popular apps like Skype, and Amazon Kindle. In the social media arena, Facebook, Twitter, Foursquare and LinkedIn are on board.

    The new BlackBerry 10 devices will be available in the U.S. on AT&T, Sprint, Verizon Wireless and T-Mobile. In statements released by AT&T and Verizon, plans to offer the BlackBerry Z10 are in place and fans can sign up to "be among the first to know when it arrives." Sprint has released plans to carry the BlackBerry Q10 later this year..

    According to BlackBerry, there are around 650 carriers that are considered to be partners in the launch of the BlackBerry 10 platform.

    Bell and Rogers Communications, who are both Canadian communications and media companies, announced plans to offer the new BlackBerry Z10, Rogers will offer the device on February 5 at $149.99 with select three-year plans. Bell is taking pre-orders and also will launch on Bell Mobility on February 5. Virgin Mobile Canada is also planning a February 5 launch of the BlackBerry Z10.

    The carriers in the United Kingdom should see availability before everyone else, with devices ready for purchase tomorrow on all their carriers, such as O2, Vodafone, Phones 4u, BT, 3UK and the Carphone Warehouse. EE, a digital communications company in the UK, will launch the BlackBerry Z10 for £49.99 ($67.82 US) on a £41 ($55.52 US) per month on a 24 month package. Pricing for the U.S. debut of the new phones have not been set and will likely come from the individual carriers. According to BlackBerry, the Z10 will available around March.

    In other surprise announcements, Research In Motion, or RIM, will be re-branded as BlackBerry. The company says it will adopt the name of its revolutionary BlackBerry smartphone to coincide with the launch of its new mobile computing platform. The company’s website, www.rim.com, has changed to www.blackberry.com

    "From today on, we are BlackBerry everywhere in the world, " said BlackBerry President and CEO Thorsten Heins.

    Heins also announced Alicia Keys as the new Global Creative Director. Keys is pitched by BlackBerry as a 14-time Grammy Award winning singer, songwriter and entrepreneur.

    Heins said Keys is an original BlackBerry power user who believes in the product and will lead an array of business initiatives to drive engagement and perception of the brand.

    Keys is expected to work closely with developers, carriers and entertainers to enhance the BlackBerry 10 platform.

    Visit us on Facebook | Follow on Twitter | Send an email | View Photo Galleries

    Click to become a LifeFlicksTech member